I've been thinking of writing about making a product mold but I was so out of ideas of what product should I design. Finally I decided to make a mold for a bottle. Before a mold can be made we will need a bottle. In this tutorial I will only show you how I made the bottle modeled from a Head & Shoulders shampoo bottle.
The bottle should have 2 parts which is the body and the cap but I just skip the cap part and model only the body. The first step is to go to the Part Design Workbench and make a sketch using the Sketcher Workbench. My sketch is as shown in the picture.
From this sketch I create a Pad with the height of 155mm. I won't be writing too detailed here so if you can't catch up on how I make the sketch or the Pad you may refer to my other tutorials.
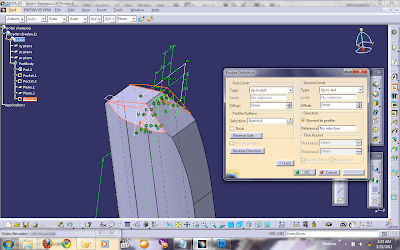
After making the pad, I cut some shapes using the Pocket tool. before that we need to sketch the shape to be removed.
In the Pocket Definition box, select the Reverse Direction and make sure the pocket cut through both direction.
Then cut some more shapes using the same methods. This is the sketch.
This is the pocket.
I tried to make an angled cut so I created some planes. The first plane:
The second plane where the sketch will be made on.
Then I made a sketch for the cut.
The use the pocket tool to make the cut.
Then I add a cap holder part to the shape using the Pad tool and add some finishing touch using chamfers and fillets. You may use your creativity on how and where to add the fillets. My end product is like this:
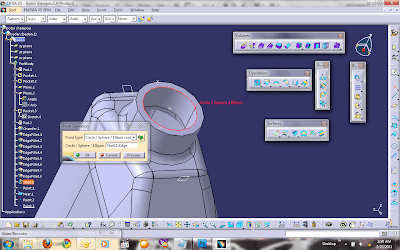
Select the upper surface of the cap holder part of the cylindrical shape. Use the Shell tool and set the Inside Thickness to 2mm. The outer thickness in 0.
Then try to add the cap thread using the Helix tool in the Generative Shape Workbench. (Start > Shape > Generative Shape). To make the thread/spring using Helix tool will require a Starting Point and an Axis. The Starting Point is shown here:
Then to make the Axis I created 2 points and then make a Line from the 2 points.
When the Starting Point and the Axis Line is ready, use the Helix tool to make the thread.
When the helix is ready, create a new plane normal to the helix curve.
On the new plane create a circle of 0.5 mm radius. Then in the Part Design Workbench, use the Rib tool with the Circle as Profile and the Helix as the Center Curve. Now the thread is ready.
Then I add Plastic as the Material and change the rendering properties a little bit. The final product is as shown.
Next tutorial is about how to make a mold for this bottle.


17 comments:
I enjoyed your post. It’s a lot like college – we should absorb everything we can but ultimately you need to take what you’ve learned and apply it.
Nice tutorial for creating this unique shaped bottle. I could really use the tip for creating models for detergents or any kind of liquid soap for that matter.
thanks for the tutorial
CATIA LOVER.
Hello, you've got a very nice blog. I was wondering if you would like to make a link exchange with my tutorial blog: http://how-to-tuts.blogspot.com/, just leave a comment with your answer on my blog and I will add your blog to my blogroll.
This is a better-quality article as they all are. I make fun of been wonder wide this an eye to some beat now. Its great to receive this info. You are fair and balanced.
Volvo 760 Turbo
You have really done a great work to share the hidden art of the great man. It is really a nice work by them. Thanks a lot for this
Volkswagen Passat Turbo
It is amazing tutorial, I really admire people who can make this figures.
If you follow this blog, for sure sooner or later id become an expert on this.
i really learn a lot in your blog. thanks
Are you going to create another tutorial creating bottle with just surfaces in GSD as opposed to using solids and part design?
How do you sketch in yz plane after pad action? You sketch on the yz plane which is along the symmetrical ais. How to obtain such planes, will you please tell me?
I just click on the yz plane before sketching. I will place your sketch on the selected plane.
How to hide outlines in the final view you have shown?
Change the preview mode
How to change the preview mode?
I'm looking for a computer that's very good, good hard drive, processor, graphics card, everything. I would be looking for something that's good for gaming, running programs that take up a lot of RAM/processor (eg. Solidworks, ProTools), and price is not an issue. Any suggestions?. Solidworks sydney
6 Weeks CATIA Summer Training In Gurgaon